A few years ago, in what amounts to a freak accident, a highly experienced outdoorsman I am acquainted with found himself in a remote area with a hunting broadhead stuck clean through his upper arm. The situation quickly became life-threatening as he was alone and had minimal first-aid equipment. After a harrowing experience everything turned out okay, but the scenario caused me to reflect on the supplies I carry into the backcountry.
While what happened above took place due to unlikely and unforeseeable circumstances, potentially serious wounds and injuries are not uncommon in the field.
Over time I have put together a fairly compact and easily portable first-aid solution that has worked well for me off the beaten path and I thought some readers might be interested in an overview.
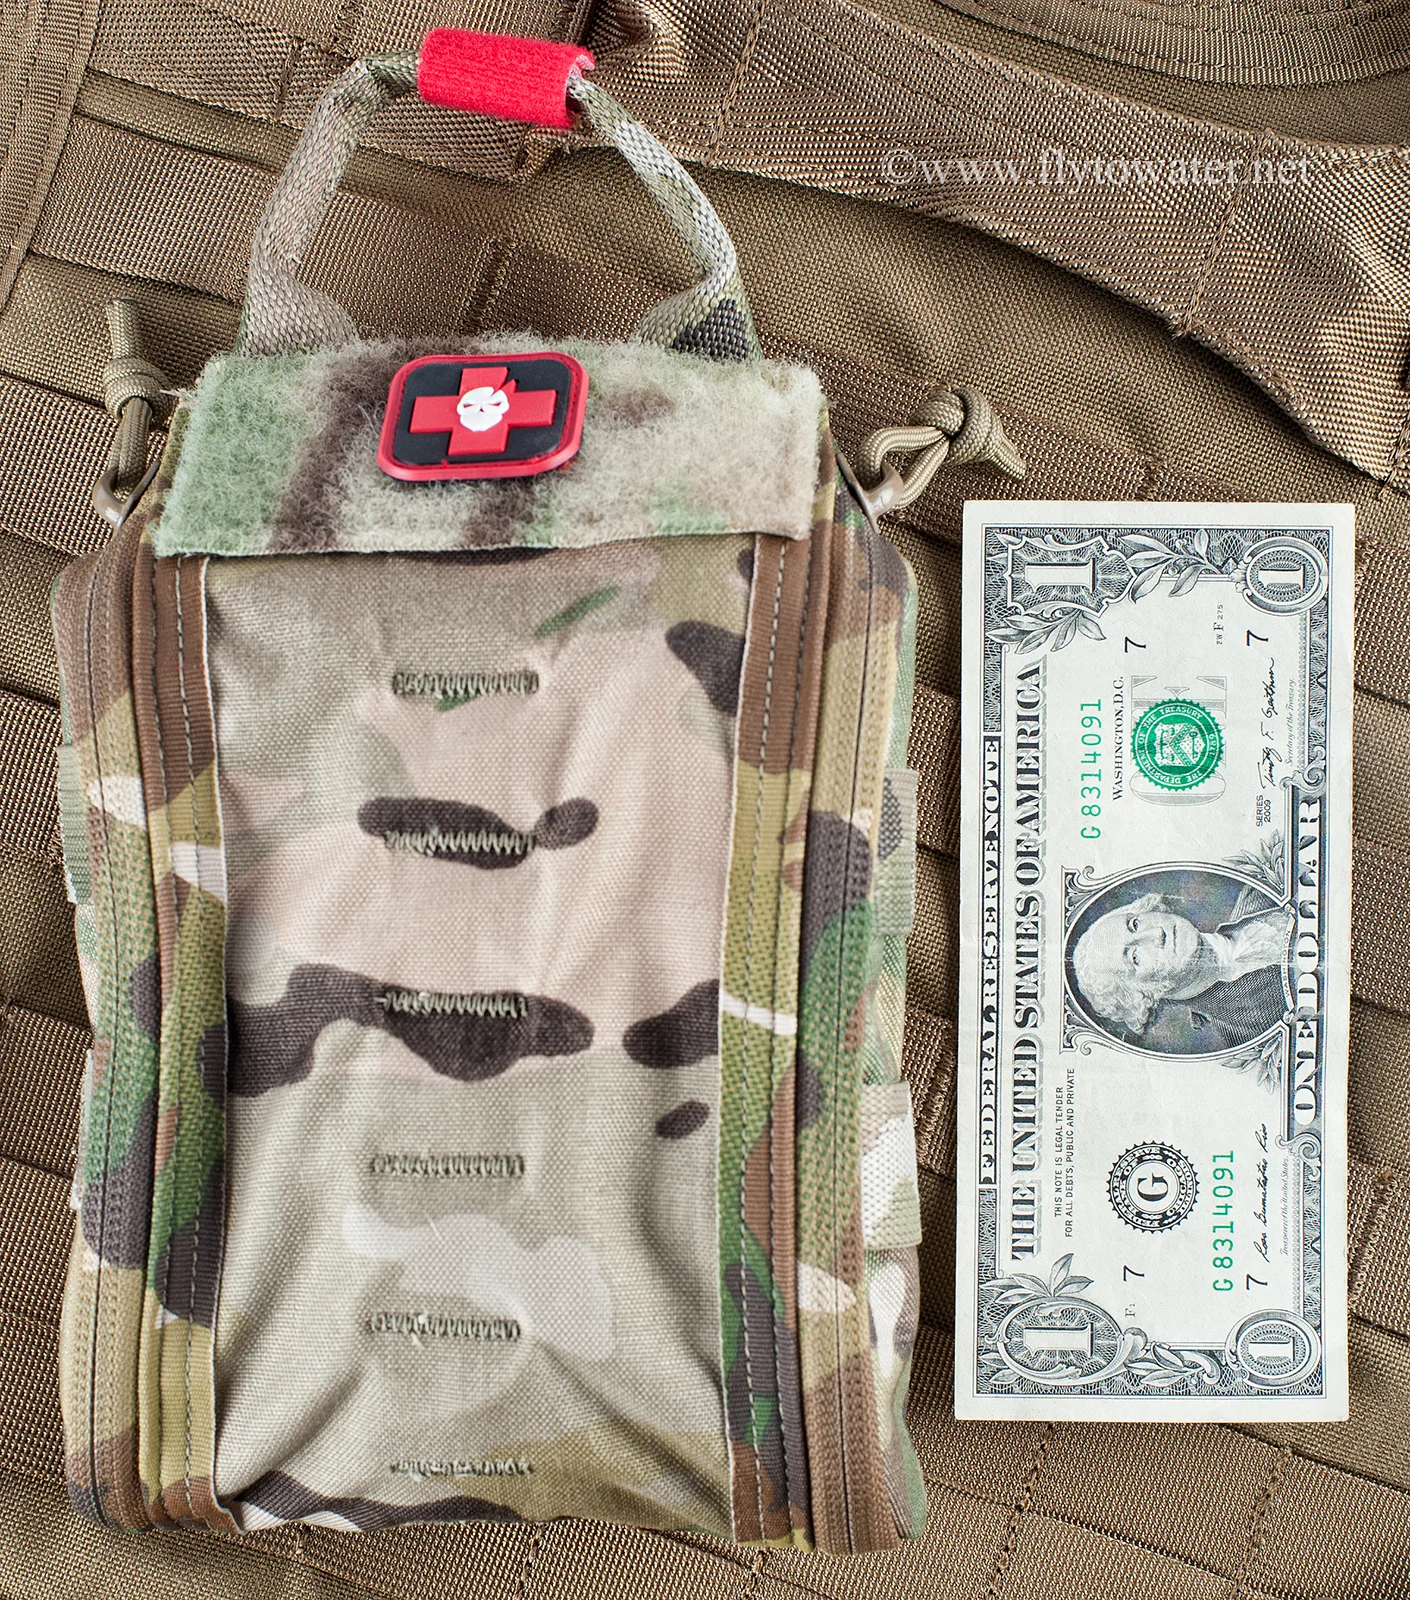
ITS Tactical Trauma Kit & Pouch Fully Loaded (FatBoy Configuration)
I started with an ETA kit designed by Imminent Threat Solutions to treat the 3 leading causes of preventable death due to injury: Extremity hemorrhage (E), tension pneumothorax (T), and airway obstruction (A). Of these, extremity hemorrhage is the most common during recreational activities. This is essentially a "blowout kit" designed for combat, but it contains solid fundamentals. It also comes in a well-designed pouch complete with PALS webbing such that it can be easily attached to just about anything using the supplied MALICE clips. Inside the standard kit you will find:
- QuikClot Combat Gauze LE (1)
- HALO Chest Seal (2)
- MojoDart Decompression Needle (1)
- Nasopharyngeal Airway (NPA) Adj. 28fr (1)
- Pressure Dressing (1 — 4″)
- Elastic Bandage (1 — 2″)
- Z-Fold Dressing (1)
- Combat Casualty Card (1)
- Nitrile Gloves (1 Pair)
- Pencil (1)
Even if you don't feel comfortable using the NPA or MojoDart, these items take up very little space and could potentially be used by a first responder if needed. The ETA can be ordered in a vacuum-sealed, waterproof package separately from the trauma kit pouch, making for a nice addition to whatever pack you already carry.
I like the webbed pouches because my daypack (Kifaru Scout) is already equipped with PALS, and I can attach the trauma kit anywhere I like. There are a variety of fishing, field, and photography packs designed with PALS/MOLLE that make this a versatile solution. As one example, the Smithfly 1x Pouch happens to fit the vacuum-packed fatboy trauma kit perfectly as well.
While this is a good start, there are a few additional components I like to have with me. First is a SOF Tactical Tourniquet which can be deployed very quickly, used with one hand, and also doubles as a pressure dressing.
Second: An EMT Toolkit consisting of bandage scissors, forceps, hemostat, and pen light. Amazon offers a nice setup complete with all of the above in a compact holster for $17. You get a big pair of quality 5.5" shears with this package, but as they are a little bulky I use those in the larger first-aid pack kept in my vehicle. The included penlight works although it's too cheaply made to be reliable (as you would expect for this price, as a quality aluminum penlight costs around $20 by itself). I replace the light with a Pelican 1910 that runs on a single AAA battery.
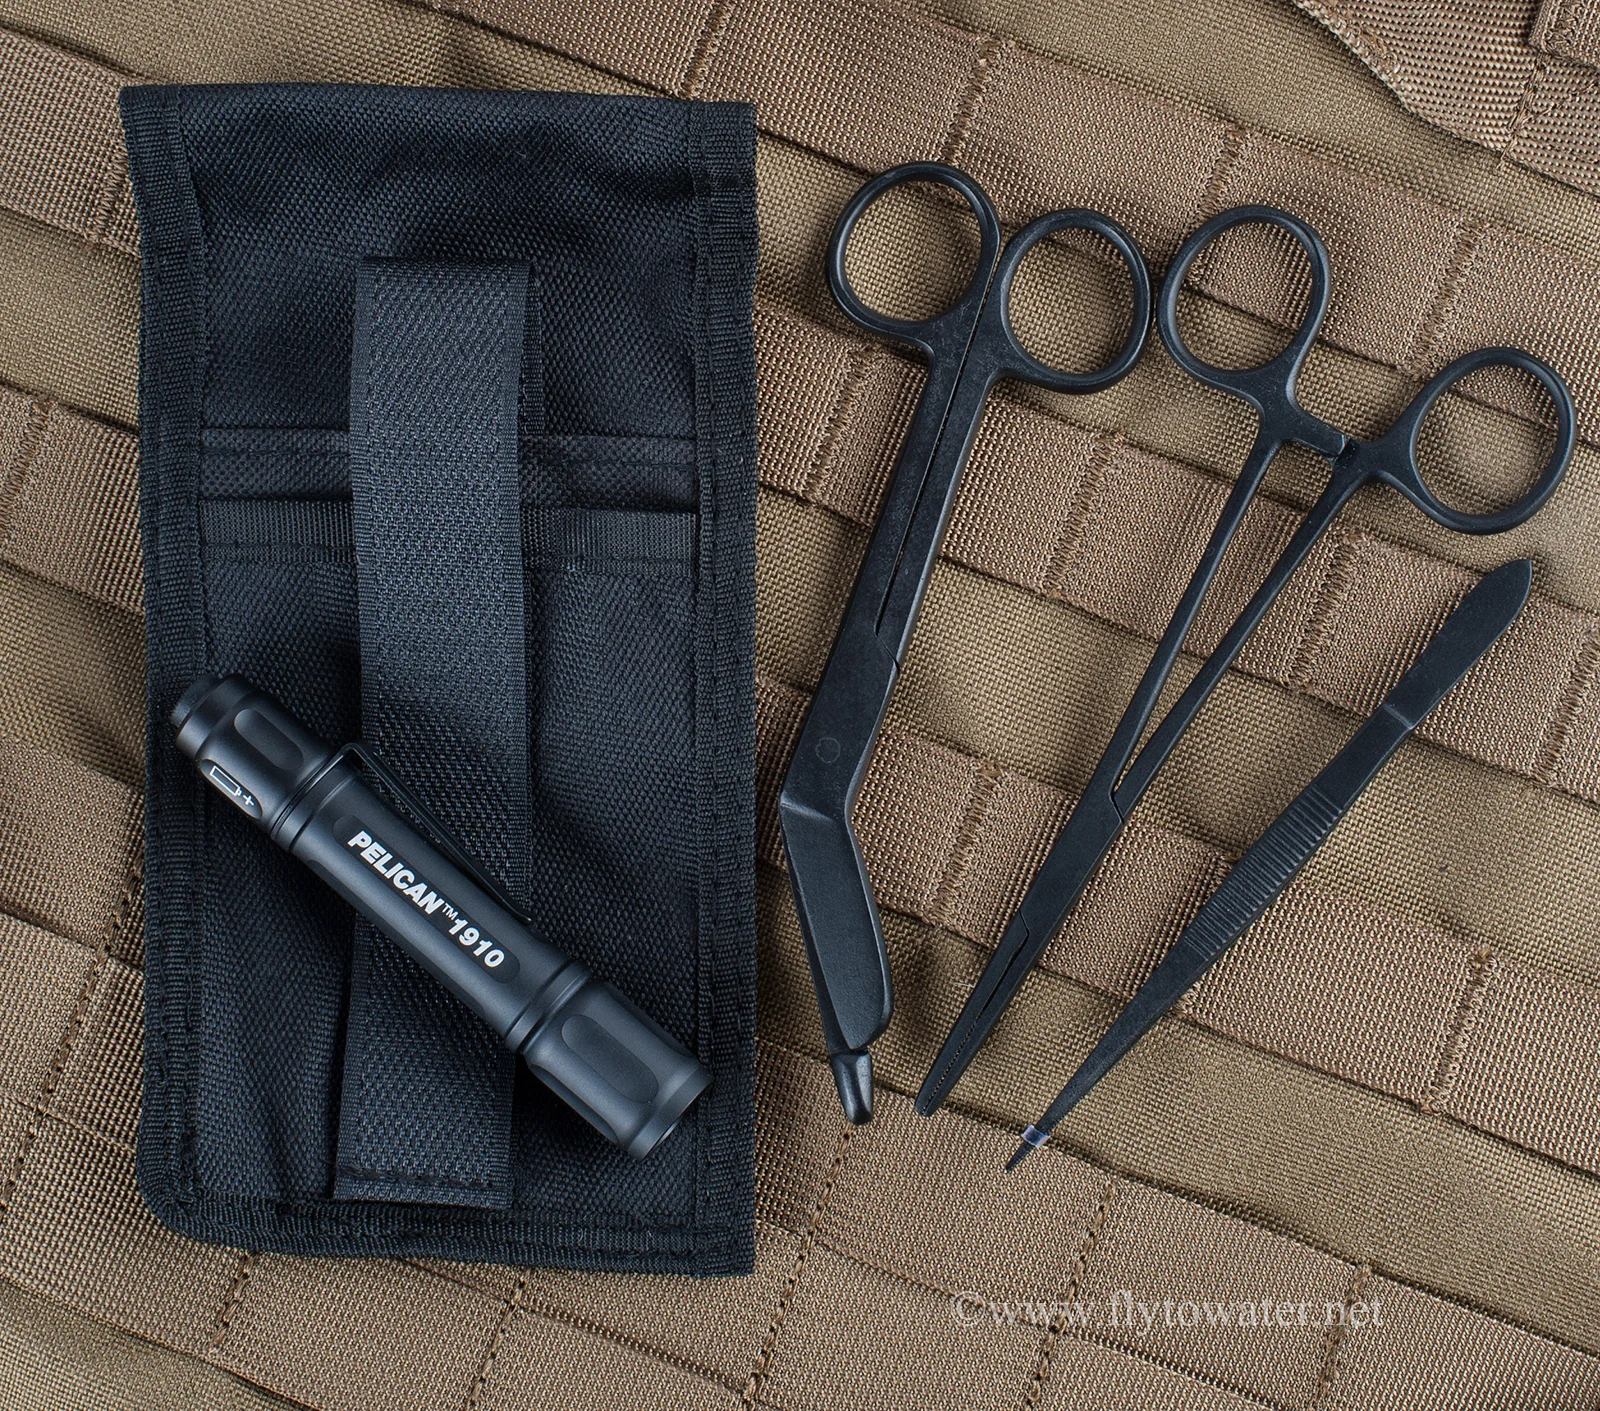
EMT Toolkit: Bandage Scissors, Forceps, Hemostat, and Pelican 1910 w/ Holster for All Items
All of what I have listed fits inside the ITS Trauma Kit Pouch except the tourniquet, which I affix using a ITS EDC Slimline Pouch. The entire kit is compact and can easily be attached to or tucked inside your favorite pack or boat bag. If you aren't already in the habit of including first-aid basics in your off-grid essentials, please give it some serious thought. Thanks for reading and have a safe and successful Fall season.
ITS Tactical EDC Slimline Pouch with SOF Tactical Tourniquet Inside (SOFTT-W)